Casting Molds
Mold-making and casting is an ancient manufacturing process in which a duplicate of an original shape can be made of some other material. The Egyptians created thousands of funerary objects such as scarabs, tiny mummy statues, and animal gods that were wrapped into the folds of bandages around a mummy. These were made by pressing clay into carved molds. The shapes were fired and glazed producing thousands of identical items.
Mass-produced pottery is created by casting watery clay slip into porous plaster molds. The water is absorbed by the mold drying the clay piece that is eventually removed an fired. Flexible rubber is used to take an impression of a very complex object and it is capable of extremely fine surface detail. Unfortunately cast materials can not dry next to rubber so a casting material has to be used that hardens due to a chemical reaction or solidifies when cooled .
Hot metal can't be cast directly into a rubber mold so instead we cast wax into the rubber mold to create a hollow wax duplicate of the original model. This is then placed in a plaster mold, the wax melted out and hot metal poured into the space left by the wax. This is called the lost wax method and it how most bronze sculpture is produced.
We will be using the direct method in which a casting material is poured directly into the rubber mold. First you make a reusable mold using silicone rubber and plaster of Paris, then you pour a casting mixture of concrete mortar and sand. Concrete is a durable and inexpensive material for learning the basic processes of casting. It is mixed as a powder with water and solidifies as the water facilitates the forming of chemical cross linkages in the calcium carbonate. Concrete is like plaster of Paris but Concrete takes longer to harden but is far more durable than plaster. Plaster left in the rain eventually dissolves away and breaks down.
Materials
- clay
- clear silicone rubber caulk
- plaster of paris
- cement mortar
- fine quartz sand
- cement acrylic admix compound
Tools
- popsicle sticks
- caulk gun
- mixing pot
- dust masks, gloves
Making a mold
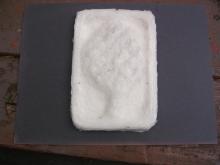
- First make a model in water based clay of the object you want to caste. This is not a lost wax method so it basically can handle any convex curved shape without deep overhangs. The silicone will be somewhat pliable but remember that whatever shape you make you will have to be able to get the model or the caste object apart from the mold. Tool the surface of the clay model as smooth as you can, the rubber will be capable of picking up incredible detail. If you want you can burnish the clay as it dries with the back of a spoon to make a shiny smooth surface. Allow the model to dry until it is leather hard but not completely dry. Your model should be set on a flat surface that forms the backside of the piece that will remain open for the casting material to be poured in.
 DSCN3038.JPG
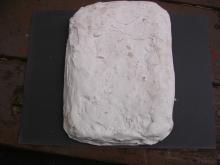
 - Wear latex gloves for the next step. Open the caulk and apply a thin coating over the model. Work a section at a time with a popsicle stick smearing the caulk and working it into the model. Be careful not to press the stick into the soft model within. This smearing action disrupts air bubbles that may be trapped under the caulk. Air bubbles that are on the surface of the model will eventually become a pimple on the cast object. Do not apply the caulk thicker than 1/8" during any coat. It should dry within an hour. Repeat this coating step several times until you have built up a layer 1/4"- 3/8" thick. You can use extra caulk during the last step to fill any voids that might trap the silicone in its plaster casing. Larger gaps can be filled with clay.
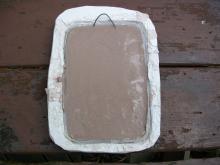
 DSCN3039.JPG
 - The plaster casing forms a rigid, tight fitting shell around the model that is now coated with rubber. It provides rigidity so that the rubber mold will keep its overall shape. It does not have to touch every part of the silicone mold to be effective. You can fill deep recesses in the model can be filled with clay temporarily thus creating a void that will not be supported by the plaster casing. Coat the rubber mold with liquid soap which will serve as a parting agent that makes it easier to remove the rubber from the plaster. Mix the plaster in a bucket until it is the consistency of peanut butter. Smear it on the silicone coated model until it is 1/2" -1" thick. Smooth out the casing and cut a flat surface on the top that is parallel with the filling opening. This will hold the mold level when it is flipped over and cast.
- Complex models may require two or three part casings. The principle is to create a section of plaster casing that can be easily pulled away from the model. On complex models the rubber mold itself can be carefully sliced along one side so that the model and final casting can be removed.
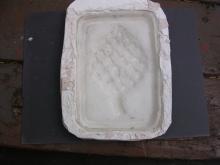
- After the plaster is hard carefully pick out the model and the rubber mold from the casing. If it doesn't come easily you can destroy the model at this point but remember that you will have to fix this problem before casting or else you cast will be trapped in the rubber / plaster mold. After you get the silicon mold free wash out any remaining model. Test the fit the rubber mold back into the plaster casing. Use a spoon or knife to carve away the inside of the plaster casing so that the rubber fits easily in and out of it. There may be many fine grooves in the casing that were formed around the last strokes on the rubber. These should be carved smooth so that they no longer pinch the mold. You can also carefully cut away sections of the outside of the rubber mold if there are pieces that are keyed into the casing.
Casting the mold
- Place the rubber mold inside its plaster casing shell on a flat surface. Level it so that when it is filled with casting compound the finished level will match the mold.
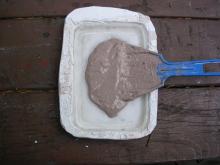
- Mix concrete mortar and sand in a mixture of 1 part cement to 2 parts sand. Add water slowly mixing as you go. If you want you can use acrylic admix which looks like thin white glue. At this stage you can also add concrete pigments if don't intend to paint the piece. This adds strength to the casting, especially if there are thin projections. You could also mix in plastic reinforcing fiber after the mold is mostly filled This increases the tensile strength of the piece. If you are not careful however plastic fibers can work their way to the finished surface of the piece creating a flaw.
- Pour the casting mixture into the mold. Tool the surface smooth and shake or rap the mold a few times to dislodge air bubbles from the surface of rubber. You can sometimes see these bubbles emerge from the top of the pour. Allow the concrete to cure at least overnight to gain enough strength to be removed from the mold.
Lever the concrete and rubber mold from the plaster casing. Be very gentle. If you get stuck you can carefully slice away at the plaster casing The concrete will gain full strength in a couple of weeks but at this stage it is easily abraded with knife. Clean up any blemishes and bevel the edge of the pour line.
Finishing the piece
- Allow casting to cure for a few days before applying a finish. Concrete is a very durable outdoor product by itself. Paints will adhere but may peel off in a few years. Try these variations
- no finish, try burying it in soil to give it an aged look.
- iron oxide stain. Apply a solution of "moss out" from the lawn section of the garden store
- enamel paint
- fake bronze patina. Spray the casting with copper spray paint and let this dry completely. Spray it again with green spray paint and while it is still wet wipe if off with a rag. The green paint will remain in the crevasses and on surface irregularities giving the appearance of a natural oxide.
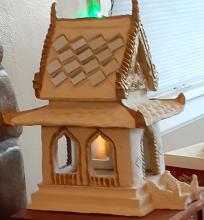
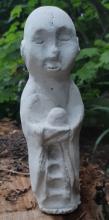
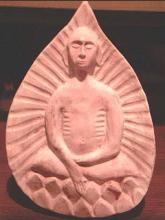
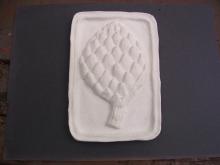
Examples